
How to Create Video with Images: From Static Slideshows to Cinematic AI Animations
By Tony, Senior Video Editing Expert
If you’ve ever tried to turn your favorite photos into a video (like a holiday recap or a quick product showcase), you probably ended up with a basic slideshow. You just lined up the pictures, added some background music, and let them fade from one to the next. It gets the job done, but it can feel a bit flat and lifeless.
Today, you don’t have to settle for those static slides. With new generative AI tools, you can actually bring a single photo to life. Instead of just fading between images, the AI can turn a photo into a short 3D video clip, making the camera pan, the wind blow, and the scene move naturally.
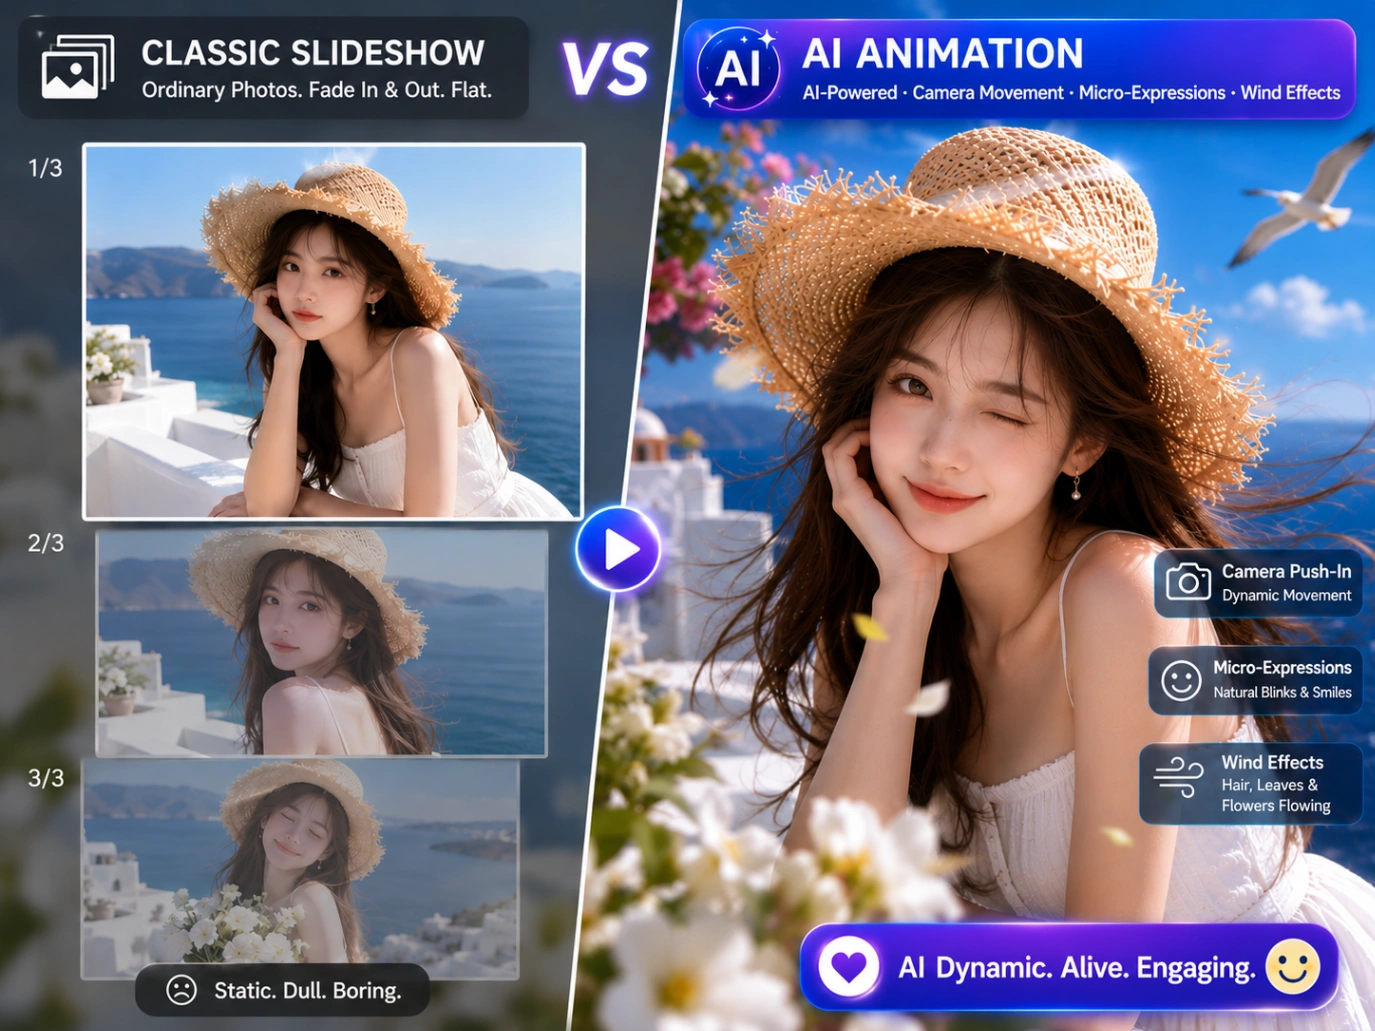
In this guide, we'll walk through both options: using AI to animate your photos into short clips, and putting multiple pictures together with music the traditional way.
TL;DR
Here is a quick look at how the two methods compare:
- The AI Way (For cinematic clips): Upload a single photo to an AI generator (such as Image to Video AI), pick a model like Kling 3.0 or Seedance 2.0, write a simple camera prompt, and let the AI animate it in 3D.
- The Traditional Way (For slideshows): Drop multiple photos into an editor (such as Canva or CapCut), sync the slide transitions to the beat of your music, and export.
Method 1: Animate Images with Multimodal Generative AI
If you want real 3D motion rather than flat panning, generative AI is the way to go. Early AI videos looked like fever dreams, with characters warping and faces melting out of nowhere. Today’s models give you actual control, letting you steer the camera path while keeping your original details sharp.
Step 1: Choose the Right AI Video Model
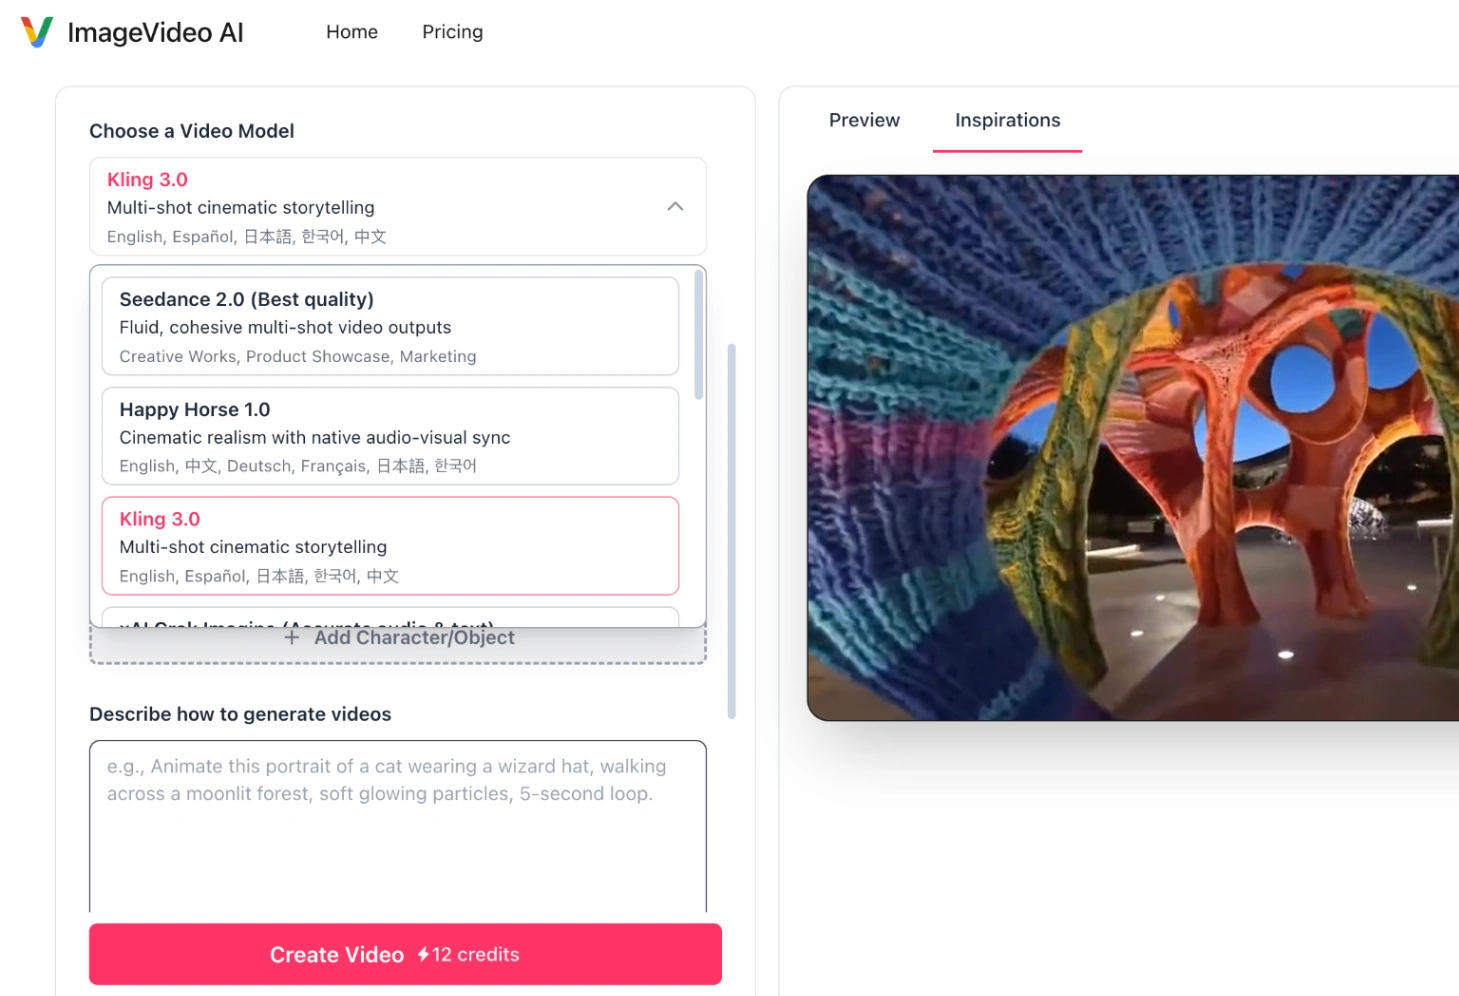
AI models are not one size fits all. A model that is great for cinematic camera pans might struggle with realistic physics. On platforms like ImageVideo AI, you can access several top-tier models in one place:
- Kling 3.0 (Pro & 4K): Best for big, movie-like panning shots and 4K clarity. It is highly optimized for sweeping camera movements and follows text prompts with great accuracy.
- Seedance 2.0 (Bytedance): Best for character shots. It keeps the shapes of your subjects stable, preventing faces and clothing from warping as they move.
- Google Veo 3.1: Best for scenes requiring natural physics, realistic lighting, and synchronized background sounds.
Step 2: Get More Control with Advanced Features
AI video generation is no longer just about typing a prompt and hoping for the best. To get the exact motion you want, try using these three practical features:
A. Direct the story with Start and End Images
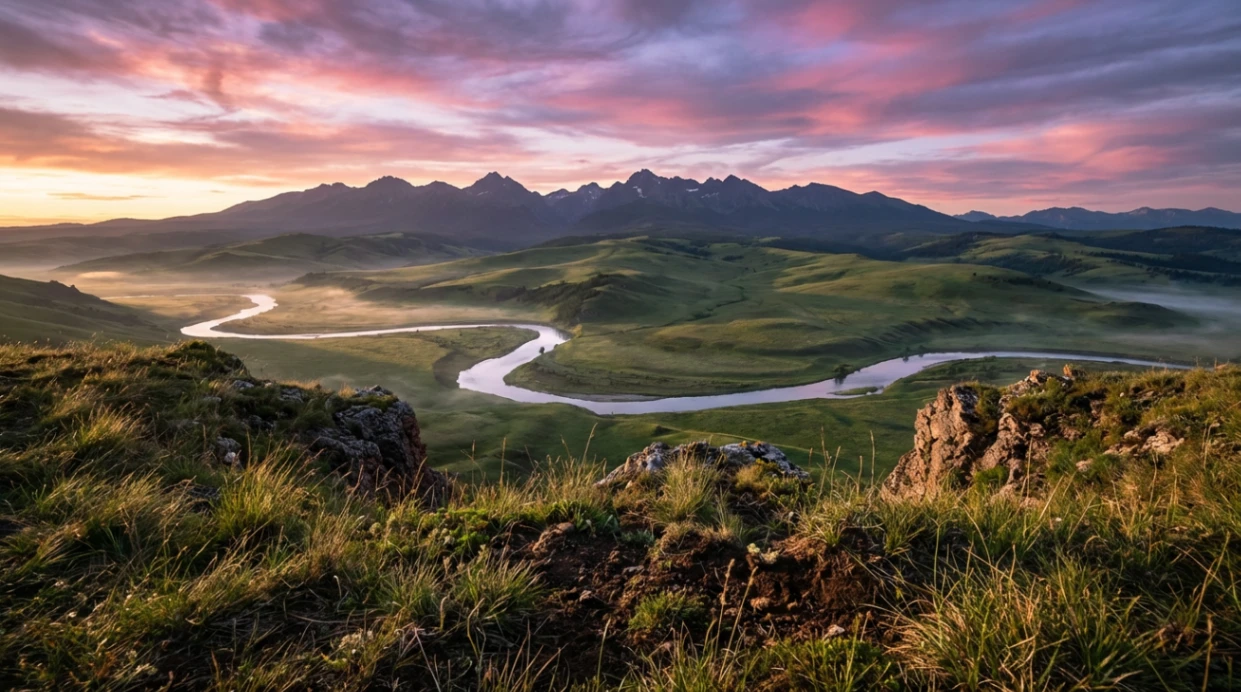
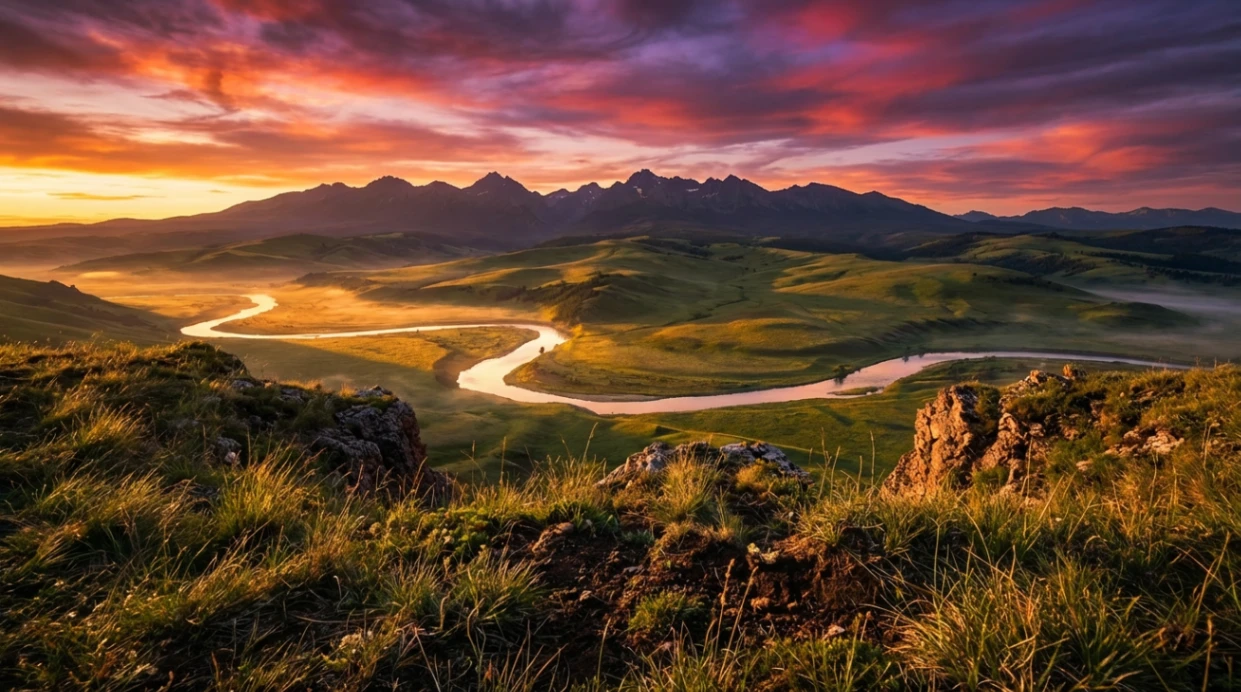
Uploading a single starting photo is perfect for letting the AI generate motion freely and naturally. But if you need a highly specific, directed transition (such as starting with a closed box and ending with it wide open), use the first-and-last frame feature. By uploading both your starting photo and your target ending photo as keyframes, you force the AI to smoothly bridge the exact gap between them.
1. Start Frame (Sunrise)
2. End Frame (Sunset)
3. Resulting AI Time-Lapse Video
B. Let the AI handle the sound design
Silent video clips feel unfinished, but doing manual sound design in editing software takes a lot of time. Modern AI generators solve this with two built-in audio options:
- Prompt-driven audio and voice: When you toggle on the audio option, you can describe the sounds you want directly in your prompt (such as "heavy rain falling, thunder rumbling, or a man speaking in a deep voice"). The AI uses your description to generate matching sound effects, and it can even create spoken dialogue that syncs with your character's mouth movements.
- Custom audio merging: If you already have a pre-recorded voiceover or a specific background music track, some models allow you to upload your own audio file (such as an MP3 or WAV) along with your starting image. The AI merges this track directly into the final video file, saving you an editing step later.
C. Direct complex scenes with multi-shot storyboards
Creating varied camera angles and smooth transitions usually requires tedious manual editing in external software. The Kling 3.0 Multi-Shot system solves this by acting as an AI director. Instead of rendering a single clip, you can map out up to six consecutive shots in a single storyboard. For each shot, you can specify a custom duration (from 3 to 15 seconds) and write a separate camera prompt. The generator then automatically manages the camera angles and transitions while keeping your characters and settings consistent. This is a massive timesaver for drafting commercial ad layouts or planning film previsualization (previs) before actual production.
Step 3: Design Your Camera Control Prompt
Even with advanced settings, clear camera prompting is essential. Use this reliable prompting formula:
[Subject Action] + [Environmental Details] + [Camera Movement] + [Style/Lighting]
Copy-Paste Camera Prompt Examples:
- The Cinematic Push-In:
"The character gently blinks and smiles at the camera, soft cinematic wind blowing through their hair, slow push-in zoom, volumetric sunset lighting." - The Drone Sweep:
"Ocean waves crashing gently against the rocky cliffside, realistic water foam physics, slow drone aerial pan shot, 4k cinematic detail." - The Subtle Parallax:
"Nebula dust swirling slowly in deep space, stars flickering, slow parallax camera drift, photorealistic sci-fi style."
Method 2: Compiling a Multi-Image Slideshow with Music
If you have a collection of product photos, event memories, or portfolio designs, compiling them into a structured slideshow remains the quickest way to tell a story.
Here is how you can build a clean, rhythmic video sequence using standard timeline editors.
Step 1: Storyboard Your Visual Pace
Before importing your images into any timeline, organize them chronologically in a local folder.
While standard video runs at 24 to 30 frames per second, a digestible slideshow requires you to hold each static image on screen for 2.5 to 4 seconds. If you go faster, your audience will not have enough time to look at the photos (and if you go slower, they might get bored).
Step 2: Choose Your Editor (Timeline-Based)
To combine images with music, you do not need complex desktop software. You can use free, web-based timeline editors:
- Canva or CapCut: Best for using ready-made transitions, quick text templates, and automated beat-matching.
- Adobe Express: Best for keeping strict brand colors, clean layouts, and presentation-style transitions.
Step 3: Layer Your Audio and Edit to the Beat
To make your slideshow feel like a cohesive film rather than a random folder of photos, your visuals need to sync with your soundtrack.
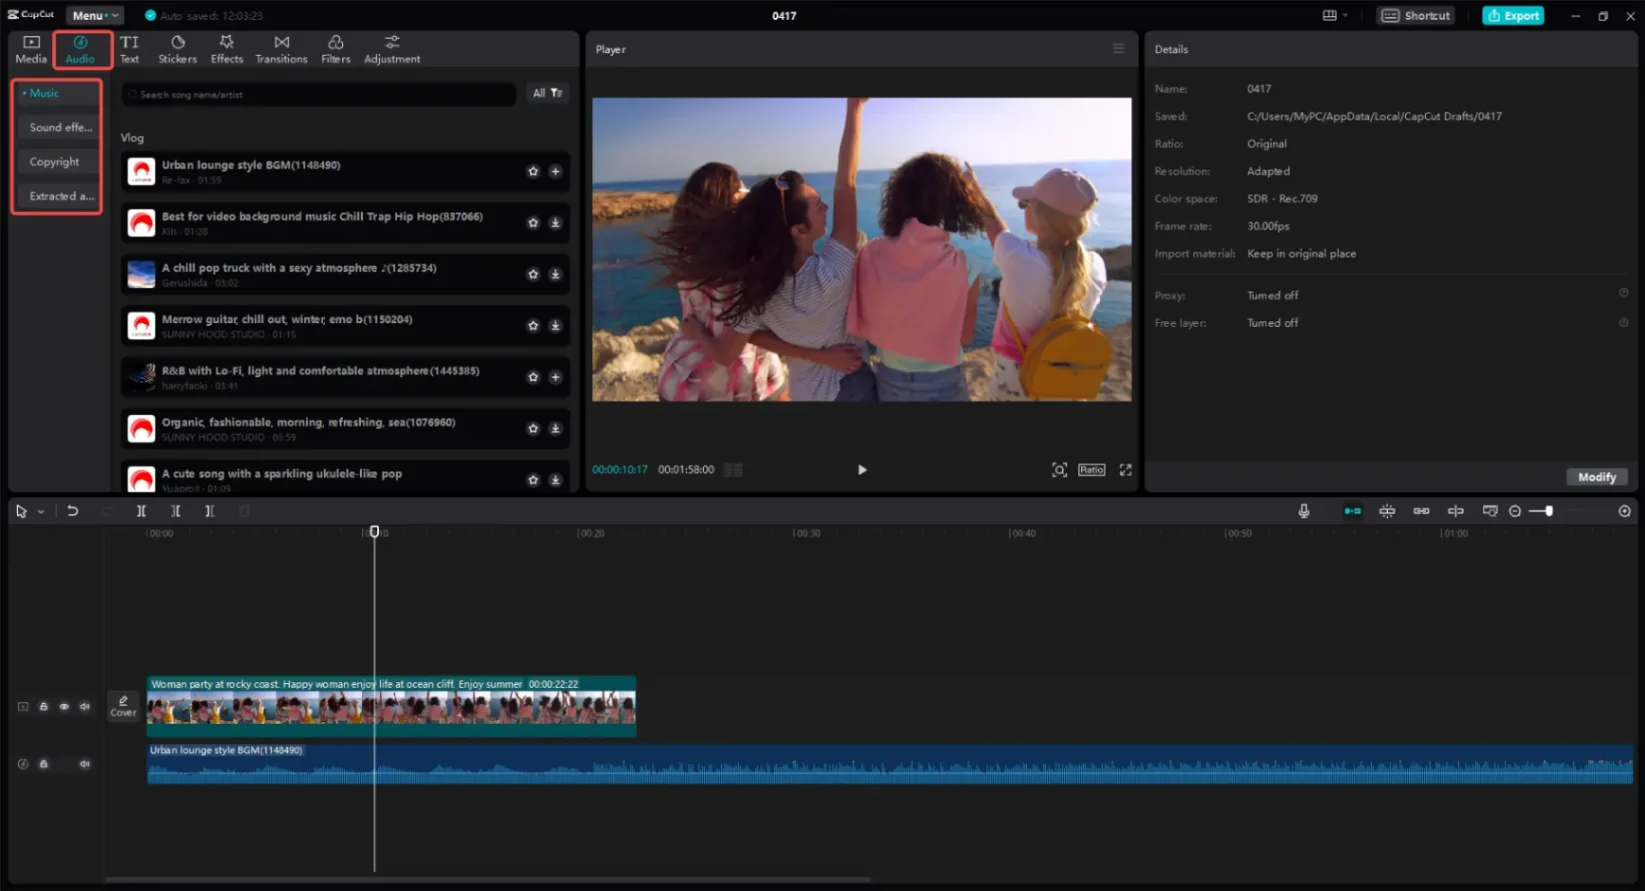
- Place Your Audio Track First: Do not edit your images first and then try to stretch an audio track to fit. Drop your MP3 or WAV file onto the timeline first to set your video’s overall duration.
- Cut on the Heavy Beats: Double-click your audio track to expand the visual waveform. Look for the vertical spikes (representing drums, bass drops, or tempo shifts). Align the transition points (where one image cuts to the next) directly with these spikes.
- Smooth the Edges: Avoid starting or ending your video with abrupt audio cuts. Instead, apply a simple 1-second fade-in at the beginning and a 2-second fade-out at the final frame.
Side-by-Side Comparison: AI Motion vs. Traditional Slideshows
| Feature | AI Image-to-Video Animation | Traditional Multi-Image Slideshow |
|---|---|---|
| Visual Output | Static elements physically move, bend, and react inside a 3D space. | Flat static photos presented sequentially with 2D transitions (fade, slide). |
| Required Input | A single image (or first & last frame combo) + text prompt. | A structured folder of multiple images + an audio track. |
| Audio Capability | Generates matching environmental sounds automatically, or merges your uploaded audio. | Manually aligned background music or voiceover tracks. |
| Best Used For | Social media hooks, cinematic ads, character animation, and dynamic storytelling. | Product catalogs, travel recaps, real estate listings, and business presentations. |
Technical Troubleshooting: Solving AI Video Edge Cases
Failed video runs waste your time and generation credits. To keep your workflow efficient, here is how to quickly fix the most common technical errors:
Issue 1: "The generation failed due to a file size or duration error"
- The Cause: Models have strict backend constraints. For example, Alibaba's Wan 2.7 reference-to-video model limits uploaded videos to between 2 and 15 seconds, with a strict file size limit.
- The Fix: Before uploading, compress your reference videos to under 50MB and trim them to the supported duration. If uploading custom audio to Wan 2.6 or 2.7, keep the file size under 15MB.
Issue 2: "My multi-character elements are merging or confusing the AI"
- The Cause: Standard image-to-video models cannot differentiate between distinct characters.
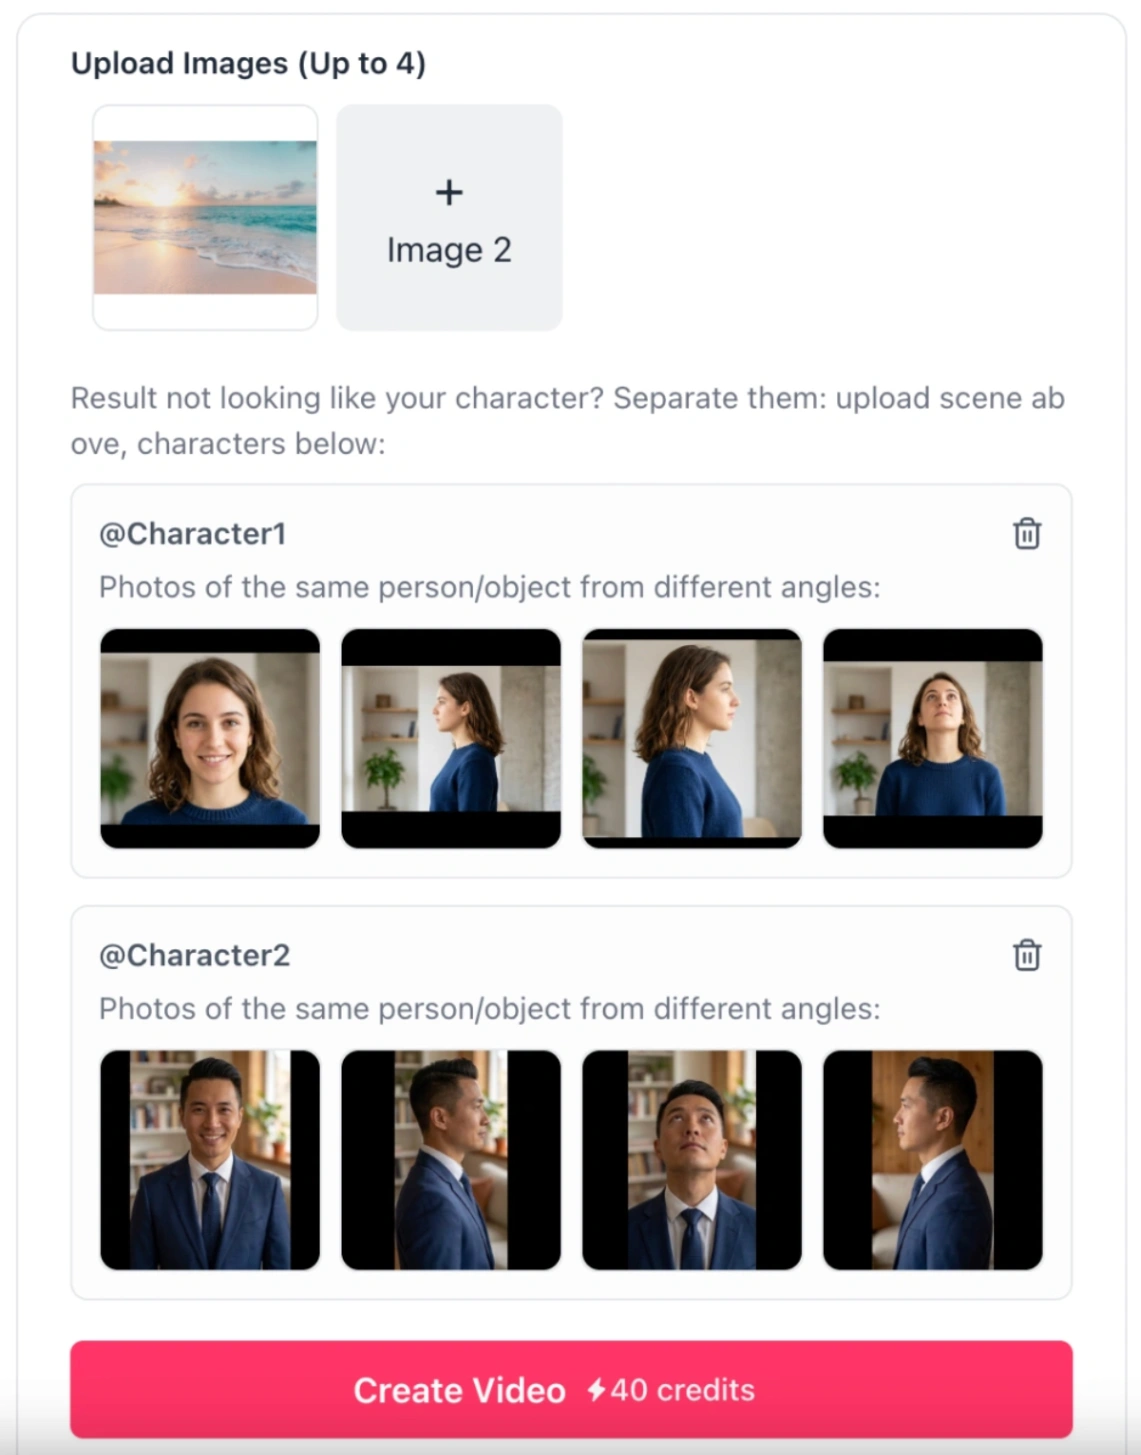
- The Fix: Use the Kling 3.0 Reference-to-Video model. This model lets you upload up to three separate characters or objects (called element inputs). You can upload two to four angles of each character (such as front-facing and side-profile shots) to help the AI remember what they look like. In your prompt, reference them directly as
@Character1or@Character2to keep their actions completely separate.
Issue 3: "Text in my generated video looks garbled, or character hands are distorting"
- The Cause: Even with advanced engines like Kling 3.0 and Google Veo 3.1, AI still struggles with fast, precise movements, text, or human anatomy like fingers and hands.
- The Fix: Avoid highly complex movements in your prompts (such as typing a password on a keyboard). Instead, focus on simpler movements (like waving, pointing, or holding a cup). If your video requires precise English text or subtitles, do not try to generate them with AI. Generate the clean video first, then add text in post-production using a tool like Add Subtitles to Video.
The Hybrid Workflow: Combining AI and Traditional Editing
With next-generation models like Seedance 2.5 now generating up to 30 seconds of seamless 4K video with precise lip-sync in a single pass, AI can easily handle the heavy lifting of video production. However, to make your video perform well on social media, you still need to bring it into CapCut or Canva for the final polish.
Here is why and how the two systems work together:
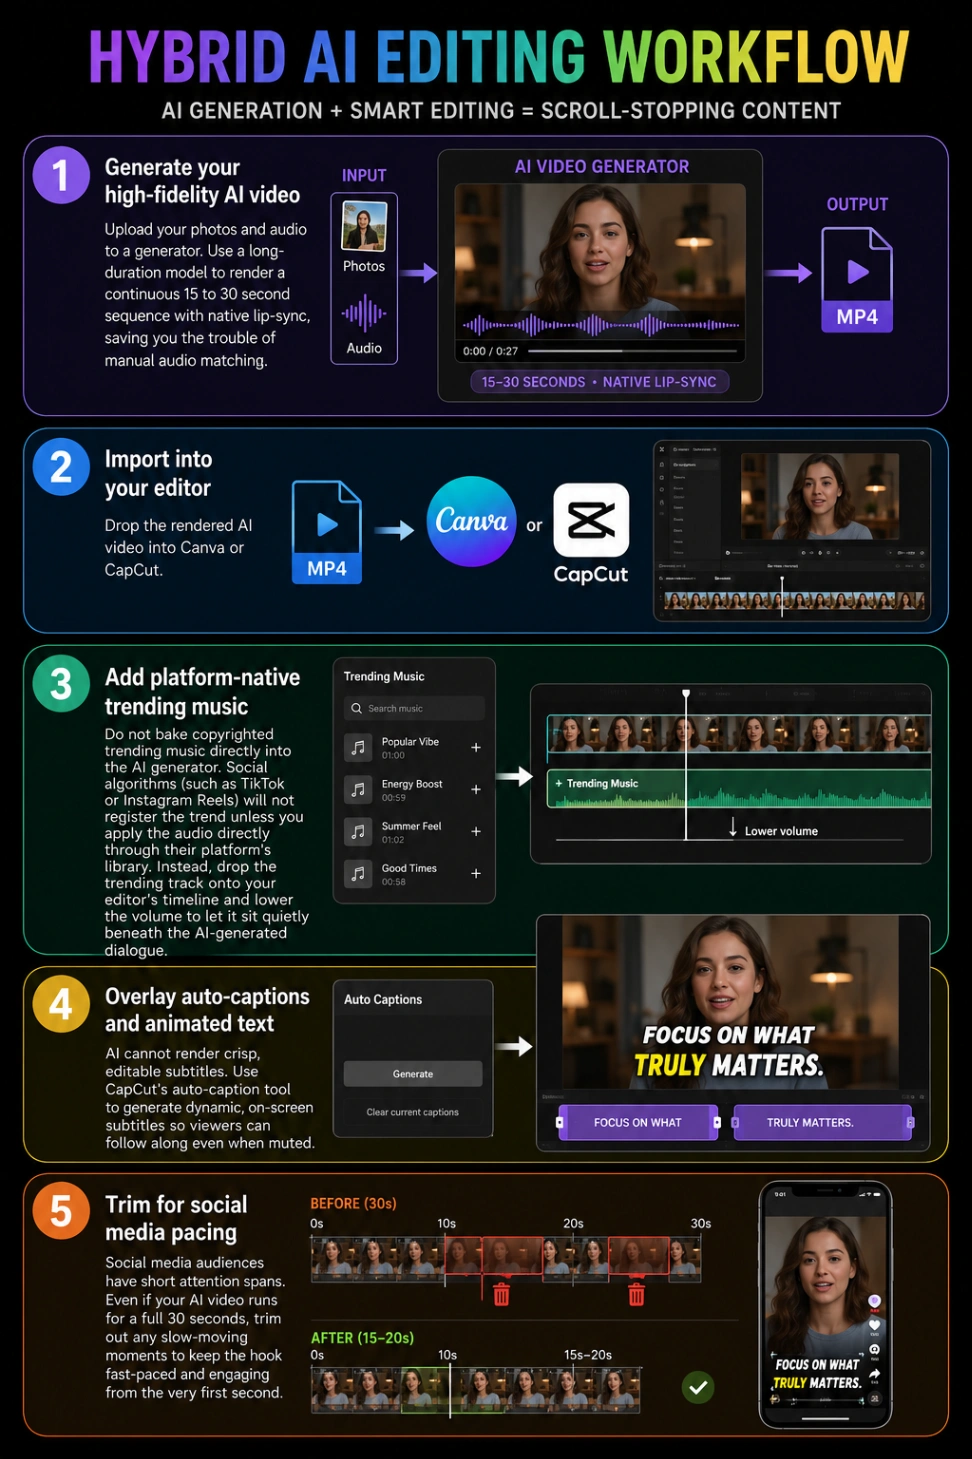
- Generate your high-fidelity AI video: Upload your photos and audio to a generator. Use a long-duration model to render a continuous 15 to 30 second sequence with native lip-sync, saving you the trouble of manual audio matching.
- Import into your editor: Drop the rendered AI video into Canva or CapCut.
- Add platform-native trending music: Do not bake copyrighted trending music directly into the AI generator. Social algorithms (such as TikTok or Instagram Reels) will not register the trend unless you apply the audio directly through their platform's library. Instead, drop the trending track onto your editor's timeline and lower the volume to let it sit quietly beneath the AI-generated dialogue.
- Overlay auto-captions and animated text: AI cannot render crisp, editable subtitles. Use CapCut's auto-caption tool to generate dynamic, on-screen subtitles so viewers can follow along even when muted.
- Trim for social media pacing: Social media audiences have short attention spans. Even if your AI video runs for a full 30 seconds, trim out any slow-moving moments to keep the hook fast-paced and engaging from the very first second.
(Tip: You can start this process directly using Kling AI Image to Video to generate your first motion clips.)
By using AI to create high-fidelity, long-duration scenes and using CapCut or Canva to handle social-native optimization (like captions and trending audio tagging), you get the best of both worlds: cinematic visuals and high platform engagement.
Frequently Asked Questions (FAQ)
What is the best AI tool to create video from images?
For cinematic storytelling and high-quality 4K output, Kling 3.0 is highly recommended. If you need highly fluid movement and character consistency, Bytedance's Seedance 2.0 is an exceptional alternative. You can test both models directly on the Image to Video AI Generator.
Do modern AI video generators support background music?
Yes, some do. Instead of rendering a silent clip and adding audio later, tools like Wan 2.7 allow you to upload a WAV or MP3 right alongside your image. The AI will merge this track directly into the output video, saving you the step of syncing them in an external editor.
Can I control both the start and end of my AI video?
Yes, by using the First & Last Frame feature. Supported by almost all major AI video platforms (such as Kling, Luma, Runway, and Wan), this option allows you to upload a starting image and an ending image, ensuring the AI-generated sequence begins and ends exactly how you designed.